React、TypeScript、ViteでChrome拡張機能を作る
React 18、TypeScript、Vite、Manifest V3を使用してChrome拡張機能を構築・公開するステップバイステップガイド。
この記事では、React、TypeScript、Viteを使ってChrome拡張機能をゼロから作成します。開発者が市場レートを確認できるFreelance Rate Calculatorを構築します。
この記事の内容:
- Chrome Extension用のReact + Vite + TypeScriptプロジェクトのセットアップ
- Manifest V3用のmanifest.json設定
- Tailwind CSSでのUI構築
- ローカルでの拡張機能の読み込みとテスト
- Chrome Web Storeへの公開
プロジェクトのセットアップ
ReactとTypeScriptで新しいViteプロジェクトを作成:
npm create vite@latest rate-calculator -- --template react-ts
cd rate-calculator
npm install
Tailwind CSSを追加:
npm install -D tailwindcss postcss autoprefixer
npx tailwindcss init -ptailwind.config.jsを設定:
/** @type {import('tailwindcss').Config} */
export default {
  content: ["./index.html", "./src/**/*.{js,ts,jsx,tsx}"],
  theme: {
    extend: {},
  },
  plugins: [],
};src/index.cssにTailwindディレクティブを追加:
@tailwind base;
@tailwind components;
@tailwind utilities;
Lucideアイコンを追加:
npm install lucide-reactManifest V3を追加
public/manifest.jsonを作成:
{
  "manifest_version": 3,
  "name": "Freelance Rate Calculator",
  "version": "1.0.0",
  "description": "Calculate your freelance rate based on tech stack, experience, and location",
  "action": {
    "default_popup": "index.html",
    "default_icon": {
      "16": "icons/icon16.png",
      "48": "icons/icon48.png",
      "128": "icons/icon128.png"
    }
  },
  "icons": {
    "16": "icons/icon16.png",
    "48": "icons/icon48.png",
    "128": "icons/icon128.png"
  }
}public/icons/フォルダを作成し、16x16、48x48、128x128サイズの拡張機能アイコンを追加します。
レートデータを追加
技術スタック、経験レベル、場所を含むsrc/data/rates.tsを作成:
export interface TechStack {
  id: string;
  name: string;
  baseRate: number;
  demand: "high" | "medium" | "low";
}

export interface ExperienceLevel {
  id: string;
  name: string;
  years: string;
  multiplier: number;
}

export interface Location {
  id: string;
  name: string;
  multiplier: number;
}

export const techStacks: TechStack[] = [
  { id: "genai", name: "GenAI / LLM", baseRate: 175, demand: "high" },
  { id: "rust", name: "Rust", baseRate: 135, demand: "high" },
  { id: "react", name: "React", baseRate: 90, demand: "high" },
  { id: "typescript", name: "TypeScript", baseRate: 92, demand: "high" },
  { id: "nodejs", name: "Node.js", baseRate: 85, demand: "high" },
  { id: "python", name: "Python", baseRate: 90, demand: "high" },
  // 他のスタックを追加...
];

export const experienceLevels: ExperienceLevel[] = [
  { id: "junior", name: "ジュニア", years: "0-2年", multiplier: 0.55 },
  { id: "mid", name: "ミドル", years: "3-5年", multiplier: 1.0 },
  { id: "senior", name: "シニア", years: "5-8年", multiplier: 1.45 },
  {
    id: "lead",
    name: "リード / アーキテクト",
    years: "8年以上",
    multiplier: 1.85,
  },
];

export const locations: Location[] = [
  { id: "usa", name: "アメリカ", multiplier: 1.0 },
  { id: "uk", name: "イギリス", multiplier: 0.85 },
  { id: "germany", name: "ドイツ", multiplier: 0.82 },
  { id: "japan", name: "日本", multiplier: 0.62 },
  { id: "india", name: "インド", multiplier: 0.32 },
  // 他の国を追加...
];
レート計算式:
const getMarketRate = (
  stack: TechStack,
  exp: ExperienceLevel,
  loc: Location
) => {
  const base = stack.baseRate * exp.multiplier * loc.multiplier;
  return {
    low: Math.round(base * 0.85),
    mid: Math.round(base),
    high: Math.round(base * 1.15),
  };
};
例:ドイツのシニアReact開発者 = 90 * 1.45 * 0.82 = $107/時
電卓UIを構築
電卓フォームでsrc/App.tsxを更新:
import { useState } from "react";
import { techStacks, experienceLevels, locations } from "./data/rates";
import type { TechStack, ExperienceLevel, Location } from "./data/rates";

function App() {
  const [stack, setStack] = useState<TechStack | null>(null);
  const [experience, setExperience] = useState<ExperienceLevel | null>(null);
  const [location, setLocation] = useState<Location | null>(null);
  const [myRate, setMyRate] = useState("");
  const [showResult, setShowResult] = useState(false);

  const getMarketRate = () => {
    if (!stack || !experience || !location) return null;
    const base = stack.baseRate * experience.multiplier * location.multiplier;
    return {
      low: Math.round(base * 0.85),
      mid: Math.round(base),
      high: Math.round(base * 1.15),
    };
  };

  const handleCheck = () => {
    if (stack && experience && location && myRate) {
      setShowResult(true);
    }
  };

  // showResultに基づいてフォームまたは結果をレンダリング
  return (
    <div className="w-[400px] h-[600px] p-4 bg-gray-900 text-white">
      {/* フォーム入力と結果 */}
    </div>
  );
}

export default App;src/index.cssでポップアップの固定サイズを設定:
body {
width: 400px;
height: 600px;
margin: 0;
overflow: hidden;
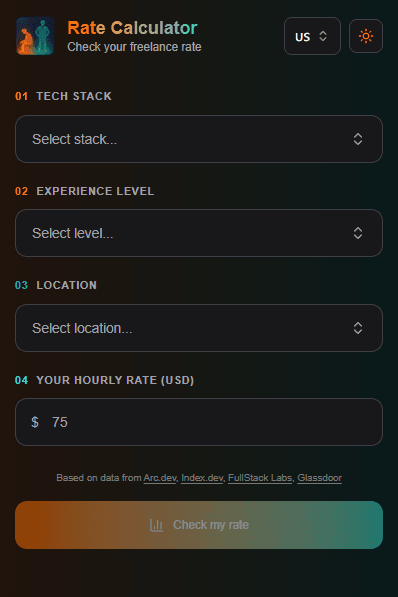
}スタック、経験、場所のドロップダウン付き入力フォーム:
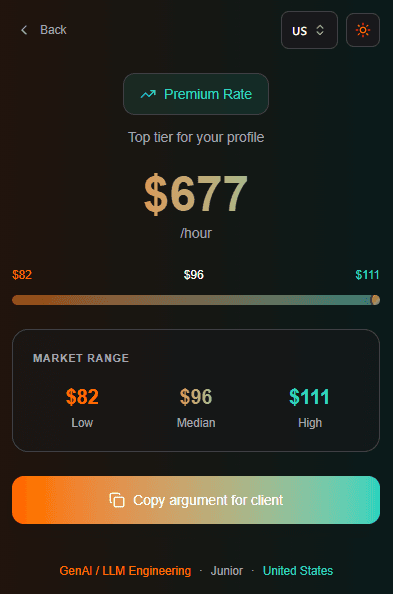
市場レート比較を表示する結果画面:
拡張機能をビルド
拡張機能ビルド用にvite.config.tsを更新:
import { defineConfig } from "vite";
import react from "@vitejs/plugin-react";

export default defineConfig({
  plugins: [react()],
  build: {
    outDir: "dist",
    rollupOptions: {
      input: "index.html",
    },
  },
});
拡張機能をビルド:
npm run buildこれにより、拡張機能ファイルを含むdist/フォルダが作成されます。
ローカルで拡張機能を読み込む
Chromeを開き、chrome://extensionsに移動します。右上の「デベロッパーモード」を有効にします。
「パッケージ化されていない拡張機能を読み込む」をクリックし、dist/フォルダを選択します。
ツールバーの拡張機能アイコンをクリックしてポップアップをテストします。
Chrome Web Storeに公開
Chrome Web Store Developer Dashboardにアクセスします。
初回は$5の一回限りの開発者登録料が必要です。
アセットを準備:
- 拡張機能アイコン:128x128 PNG
- スクリーンショット:1280x800または640x400
- プロモーションタイル:440x280
dist/フォルダのZIPを作成:
cd dist && zip -r ../extension.zip . && cd ..ZIPをアップロードし、説明を入力し、スクリーンショットを追加して、審査に提出します。
審査には1〜3日かかります。よくある却下理由:
- 説明文でのキーワードの詰め込み
- プライバシーポリシーの欠如(権限を使用する場合)
- 不正確なスクリーンショット
承認後:
まとめ
以上です。React、TypeScript、ViteでChrome拡張機能を構築し、ローカルでテストし、Chrome Web Storeに公開しました。
最終スタック:
- React 18
- TypeScript
- Vite
- Tailwind CSS
- Manifest V3
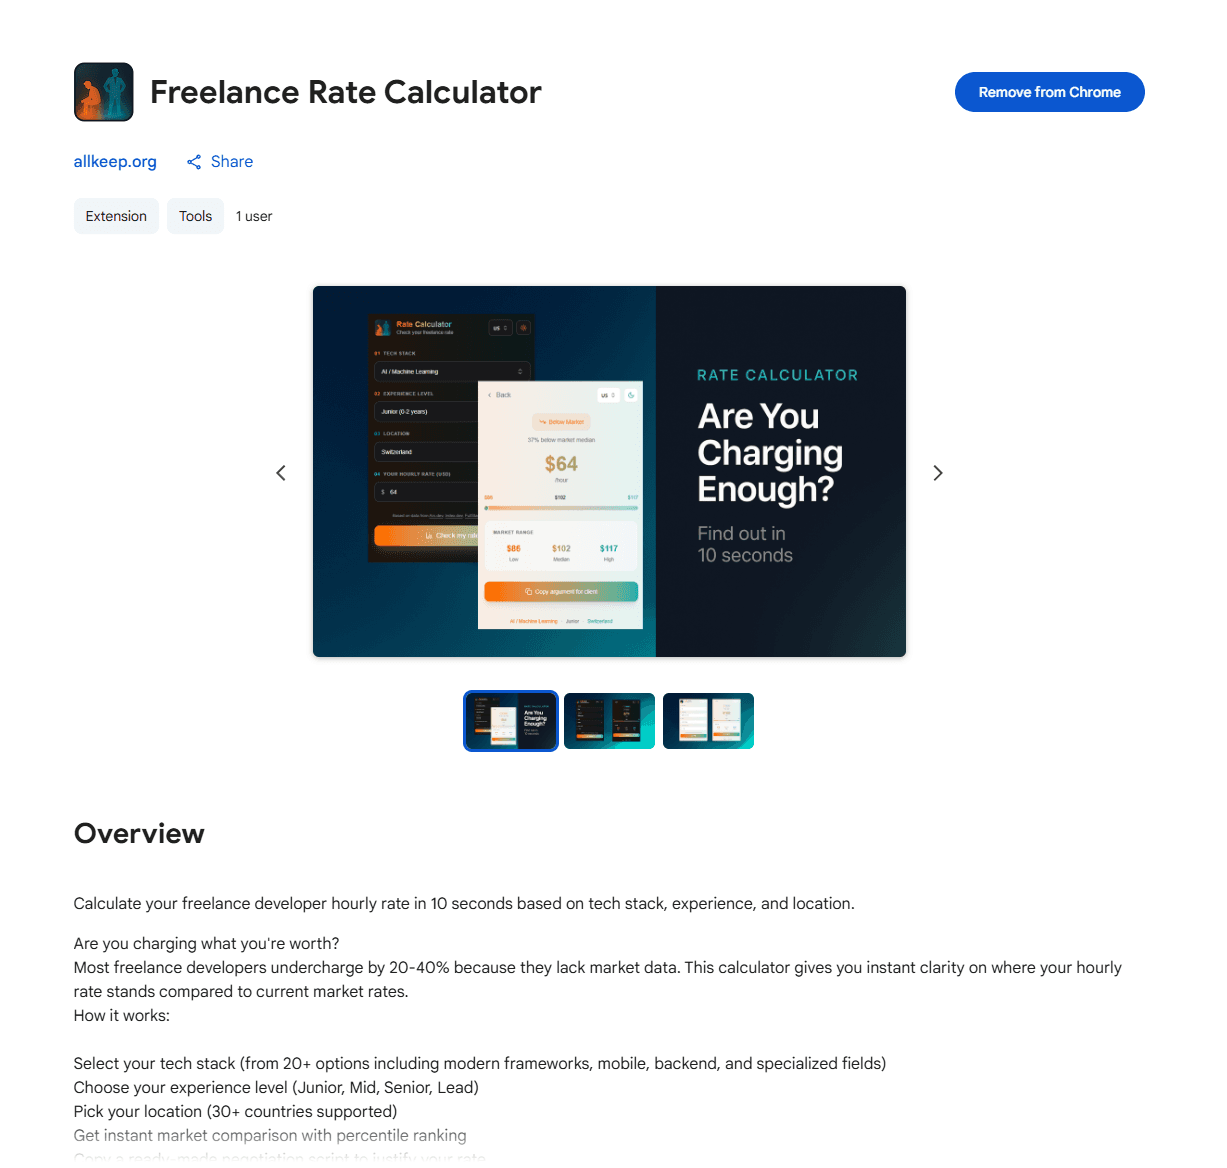
拡張機能:Freelance Rate Calculator
記事が気に入りましたら、Twitter @Nefayranをフォローしてください — #buildinpublicコンテンツ。
